


Restoring a Tesla's Safety Cell requires meticulous precision, adherence to OEM guidelines, and skilled technicians using specialized tools. The process involves disassembly, damage inspection, replacement with approved parts, and rigorous verification of structural integrity for optimal performance and passenger safety. Following OEM-approved procedures and best practices ensures consistent quality and replicates Tesla's stringent safety standards.
Tesla owners often marvel at their vehicle’s advanced technology, but few know about the car’s hidden hero: the Tesla Safety Cell. This structural backbone is vital for passenger protection in collisions. This article delves into the intricate world of Tesla safety cell restoration, exploring why it demands OEM-approved procedures to ensure structural integrity and driver safety. We’ll guide you through the process, highlighting best practices for optimal quality and safety during this critical restoration.
- Understanding Tesla's Safety Cell: A Crucial Component
- The Restoration Process: Step-by-Step Guide Using OEM-Approved Practices
- Benefits and Best Practices for Ensuring Optimal Safety and Quality
Understanding Tesla's Safety Cell: A Crucial Component

The Tesla Safety Cell is a critical structural element that encompasses the vehicle’s frame and chassis, playing a pivotal role in protecting occupants during accidents. Its design integrates advanced materials and engineering to absorb and distribute crash forces effectively, enhancing overall safety standards. Restoring this crucial component requires meticulous attention to detail and adherence to OEM-approved procedures.
Tesla’s safety cell restoration involves a comprehensive process that includes precision disassembly, careful inspection for damage, and the utilization of original equipment manufacturer (OEM) replacement parts. Skilled technicians in a reputable vehicle body shop employ specialized tools and techniques to ensure the integrity of the car bodywork while conducting thorough vehicle paint repair, if necessary. This meticulous approach guarantees that the safety cell not only meets Tesla’s rigorous standards but also restores the vehicle to its optimal structural condition, ensuring peace of mind for drivers and passengers alike.
The Restoration Process: Step-by-Step Guide Using OEM-Approved Practices

The Tesla Safety Cell Restoration process involves a meticulous, step-by-step approach using only OEM (Original Equipment Manufacturer)-approved procedures and components. It’s a crucial aspect of maintaining the vehicle’s structural integrity, safety features, and overall performance. The guide below provides an overview of this precise method:
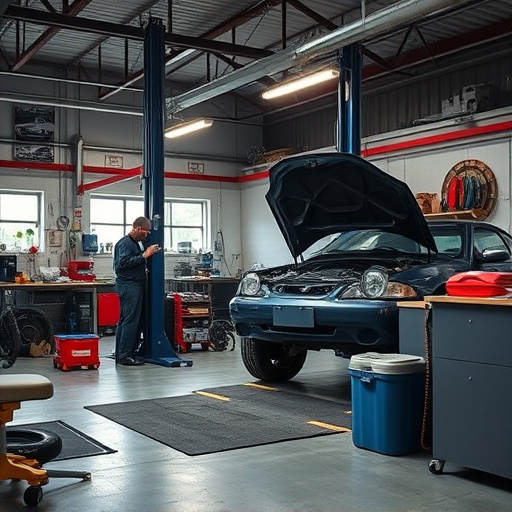
1. Preparation: Begin by ensuring the vehicle is securely parked on a level surface with wheel chocks in place for safety. Put on protective gear, including gloves and safety glasses. Gather all necessary tools and OEM parts specifically designed for your Tesla model.
2. Inspection & Disassembly: Carefully inspect the damaged area, identifying the extent of the issue. Disassemble components that require access to the safety cell, such as doors, hoods, or fenders, using specialized tools. This step demands precision and attention to detail to avoid further damage.
3. Safety Cell Inspection: Remove any debris and thoroughly examine the safety cell for cracks, dents, or deformations. Verify the integrity of the structural elements, including beams, brackets, and extrusions, which are vital for passenger protection.
4. Repair & Replacement: Using OEM repair manuals and guidelines, commence repairs by replacing damaged components with authentic Tesla parts. This may involve welding, riveting, or bolting new sections in accordance with factory specifications. For tire services or collision repair, ensure alignment and balance checks post-replacement to maintain optimal vehicle dynamics.
5. Finishing Touches: Once the safety cell is restored, carefully reassemble the disassembled panels, ensuring proper sealing for water intrusion prevention. Test all electrical systems and safety features to confirm their functionality.
Benefits and Best Practices for Ensuring Optimal Safety and Quality

Restoring a Tesla safety cell to its original condition is paramount for maintaining optimal vehicle performance and passenger security. One of the key benefits of adhering to OEM-approved procedures is ensuring consistent quality. By following Tesla’s specific guidelines, restorers can accurately replicate the manufacturer’s standards, guaranteeing that every component meets their stringent safety criteria. This meticulous approach minimizes potential risks associated with altered or subpar parts, which could compromise the overall structural integrity and defensive features of the vehicle.
Best practices for Tesla safety cell restoration include using only genuine OEM replacement parts, strictly adhering to the manufacturer’s repair manuals, and utilizing advanced diagnostic tools to verify repairs. Moreover, maintaining a clean and organized workspace is essential, mirroring the meticulous craftsmanship employed by Tesla in their original manufacturing processes. Regular training on the latest safety protocols and technology ensures restorers stay abreast of advancements in collision repair services and tire services, further enhancing the overall restoration quality.
Tesla’s Safety Cell is a vital component that ensures the structural integrity and overall safety of their vehicles. Restoring this crucial element using OEM-approved procedures is essential for maintaining optimal performance and passenger protection. By following a meticulous step-by-step guide, as outlined in this article, Tesla owners and professionals can ensure that any restoration work is done right, preserving the vehicle’s safety features and enhancing its longevity. This meticulous approach to Tesla safety cell restoration is a game-changer, allowing for high-quality repairs that meet original equipment manufacturer (OEM) standards, ultimately providing peace of mind on the road.